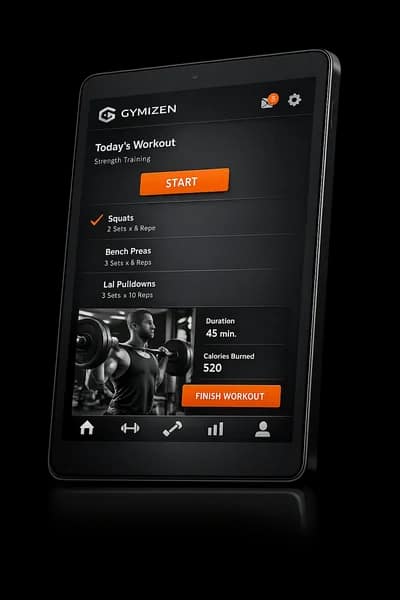


Most studios don’t fail at retention because they don’t care. They fail because the day gets busy—so follow-ups happen “when we have time,” reminders get sent inconsistently, and policy exceptions become a personality contest at the front desk. Gymizen automations are designed to take your most important operational rhythms (reminders, nudges, and internal tasks) and make them reliable. But reliability only works if you pair automation with approval gates: clear rules about what happens automatically, what requires manager review, and what gets logged when someone overrides the default.
This guide is a concrete 14‑day implementation checklist for owners and managers rolling out automation workflows in Gymizen. It includes prerequisites, role-by-role responsibilities, recommended defaults, QA checks, common mistakes, a rollout timeline, and what success looks like inside Gymizen once the system is live.
What you’ll build (and what you won’t)
In 14 days, you’ll implement a small set of high-leverage automations that reduce staff load and protect member experience—without creating a “set it and forget it” machine that spams members or grants exceptions silently.
- Member-facing automations: booking confirmations, class reminders, waitlist notifications, follow-ups after missed classes, and “next-step” nudges.
- Ops automations: internal tasks for at-risk members, follow-ups for pending questions, and exception-review queues for managers.
- Approval gates: rules that require review before credits/refunds, policy overrides, hold/reactivation exceptions, or manual attendance edits (depending on your setup).
You will not try to automate every edge case. The goal is to make the common path effortless and the exception path intentional.
Prerequisites (don’t skip these)
Automation is downstream of clean configuration. If your foundational objects are messy, automations will amplify the mess faster.
- Your pricing + membership catalog is final (at least for go-live). If you’re still changing pack rules, renewals, or intro offers daily, automation triggers will drift. If you haven’t done this yet, start with How to Build Your Pricing + Membership Catalog in Gymizen.
- Reservation + attendance rules are stable (late cancel/no-show, waitlist logic, check-in). Automations often depend on attendance outcomes. If you’re still refining policies, coordinate with Late Cancels + No‑Shows in Gymizen and Class Reservations + Waitlists.
- Staff roles + permissions are set so approval gates route correctly. If permissions are not locked, you can’t meaningfully enforce “who can approve what.” Use Staff Onboarding + Permissions first.
- A single owner/ops lead is accountable for automation decisions. “Everyone gets a vote” creates contradictory rules and mixed member messaging.
- Your member communication channels are chosen (push/email/SMS) and your brand voice is documented in 8–12 lines (tone, punctuation, sign-off, how you refer to coaches, etc.).
Roles & responsibilities (who does what in the rollout)
Automations touch member experience and revenue protection. Treat this like a real rollout, not “a settings tweak.”
- Owner (Accountable): approves policy defaults, defines which exceptions require approval, signs off on member-facing copy, reviews week-1 metrics.
- GM / Studio Manager (Responsible): configures workflows, runs QA checks, trains front desk + coaches, owns the exception queue daily.
- Front Desk Lead (Responsible): tests booking/reminder flows end-to-end, documents what staff should do when automation triggers, reports confusing member feedback.
- Coaches (Consulted): confirms class-day realities (warm-up timing, check-in behavior, “what members actually do”), supports consistent enforcement.
- Bookkeeper / Billing Admin (Informed): understands which actions are now gated and what will appear in event history for audits.
Recommended defaults (start here, then adjust)
These defaults are designed for boutique fitness operators who want consistent operations, fewer support tickets, and fewer “but they told me last time…” conversations.
- Minimize member-facing messages to the moments that matter: confirmation, reminder, waitlist movement, and a small number of recovery nudges.
- Prefer “one clear call-to-action” per message (book, confirm, cancel, update card, reply to staff).
- Use approval gates for anything that changes money, policy enforcement, or attendance truth: credits, refunds, backdating holds, waiving fees, manual attendance edits, and “we’ll make an exception this time.”
- Route exception approvals to a role, not a person. People go on vacation; roles persist.
- Log the why. Any approved exception should require a reason note. Over time, this becomes your “policy bug tracker.”
The 14‑day rollout plan (with QA gates)
This timeline assumes your schedule, pricing, and staff permissions are already configured. If they aren’t, extend the timeline—don’t compress QA.
Days 1–2: Define your automation map (what triggers what)
Start with a one-page map. If you can’t explain your automation system on one page, staff won’t follow it and members will receive confusing messages.
- List your “member journey moments” you want to support: first visit, booking, waitlist, late cancel/no-show, post-class, missed week, payment issue, hold, reactivation.
- Pick the first 6 automations to implement (recommended set below). Everything else becomes backlog.
- Define the exception policy: what front desk can do instantly, what requires manager approval, and what requires owner approval.
- Choose channels (push/email/SMS) for each automation. Use fewer channels than you think—especially at the start.
Recommended “first 6” automations for most studios: (1) booking confirmation, (2) class reminder, (3) waitlist movement notification, (4) no-show follow-up, (5) 7-day inactivity nudge, (6) internal task for “attendance cliff” risk.
Rule of thumb: if an automation can be wrong and cause harm (money, policy, trust), gate it. If it can be occasionally imperfect but still helpful (a reminder), automate it and measure complaints.
Days 3–4: Configure approval gates first (before messages)
Most teams do this backwards: they write nice messages first, then try to retrofit control. Instead, decide who can approve what, and what the default behavior is when approval is required.
- Identify “gated actions” in your studio: fee waives, credits, refunds, hold backdating, no-show reversal, membership downgrade exceptions, discount exceptions.
- Assign approver roles: typically Manager approves most exceptions; Owner approves refunds/discount exceptions above a threshold.
- Define “required fields” for approvals: reason + internal note. (If the system allows it, require selecting a reason category, not just free text.)
- Set escalation rules: what happens if a request sits unapproved for 24 hours? Who gets pinged?
- Decide what members see: for gated items, do members receive an immediate “request received” message, or do you keep it internal until approved?
If you want a dedicated rollout for money-related controls, pair this article with Refunds, Credits, and Account Adjustments.
Days 5–7: Build member-facing automations (keep them tight)
Now you can configure the member-facing pieces with confidence, because you already know which outcomes are allowed automatically and which are gated.
Automation 1: Booking confirmation (immediate)
Purpose: reduce “Am I booked?” messages and decrease double-booking confusion. Keep it short and include a single action link (view/cancel).
- Trigger: member books a class / appointment.
- Channel: push preferred; email acceptable; avoid SMS unless your clientele expects it.
- Default copy components: class name, date/time, location, cancellation cutoff (if relevant), how to join waitlist (if full).
- Approval gates: none (this should always be safe).
Automation 2: Class reminder (24 hours + optional 2 hours)
Purpose: reduce no-shows, reduce last-minute confusion, and help members plan. Reminders are powerful, but doubling them can feel spammy—start with one.
- Trigger: upcoming booked class.
- Default: 24 hours before start time.
- Optional: 2 hours before start time for early-morning classes or high no-show segments.
- Include: “Cancel in the app if you can’t make it” (so spots free up).
- Approval gates: none.
Automation 3: Waitlist movement notification (instant + confirmation)
Purpose: reduce “Did I get in?” inbound messages and prevent empty spots created by silent waitlist promotions.
- Trigger: member moves from waitlist to booked.
- Channel: push + email; SMS only if you have a short “confirm” loop.
- Include: “You’re in—tap to confirm/cancel” if your workflow supports confirmations.
- Approval gates: none (waitlist logic should be controlled via reservation rules, not manual approvals).
Automation 4: No-show follow-up (same day)
Purpose: recover member confidence and prevent the “ghost spiral” after missed workouts. This message should feel human, not punitive. Keep policy reminders neutral—especially during rollout.
- Trigger: attendance marked as no-show.
- Timing: 1–3 hours after class start time (not immediately).
- Include: next recommended class link + “Need help getting back in? Reply here.”
- Approval gates: if the follow-up includes a fee/credit offer, gate the credit. The message can still send automatically without promising money.
Automation 5: 7-day inactivity nudge (light touch)
Purpose: prompt re-engagement before “I fell off” becomes cancellation. Keep it simple and action-oriented: book something this week.
- Trigger: member has not attended in 7 days (or 10 days for 1x/week plans).
- Exclude: members on hold, cancelled, or in a defined “injury pause” segment.
- Channel: email or push; avoid SMS unless you’ve proven it helps and doesn’t cause opt-outs.
- Approval gates: none.
Days 8–9: Build internal automations (tasks + exception routing)
Your biggest operational wins often come from internal workflows—not more messages to members. Internal automations make sure the right staff member sees the right situation at the right time.
Automation 6: “At-risk” task queue (attendance cliff signal)
Purpose: create a daily/weekly list of members who are quietly disengaging so you can intervene early with a human touch (not a discount).
- Trigger: attendance drop-off pattern (for example, a member who attended 2–3x/week now at 0–1x/week for 10–14 days).
- Owner: assign to Manager or a designated Retention Captain.
- Task fields: recommended outreach template, last attended date, membership type, notes from prior outreach.
- Approval gates: any offer that impacts billing (credits/discounts/holds) must route through approvals.
If your team wants a full operating system for this, connect the task queue to your weekly meeting rhythm using Weekly Reporting + Operating Cadence and the framework in The Attendance Cliff.
Internal exception routing: “requests” vs “done deals”
When front desk staff can’t approve something (credit, fee waiver, backdated hold), the workflow must create a request—not an invisible backdoor. The request should land in a manager queue with a timestamp, member context, and a required reason.
- Define request types: “Waive late cancel,” “Reverse no-show,” “Credit pack,” “Backdate hold,” “Refund request.”
- Set SLA expectations: e.g., manager reviews within 24 hours on business days.
- Define member communication: front desk uses a standard line: “I can submit this for review and we’ll follow up by tomorrow.”
- Define the fallback: if not approved, what does the member receive (if anything)? Keep it consistent and polite.
Days 10–11: QA testing (your non-negotiable gate)
QA is where most teams save themselves from week-one chaos. Your goal: test the workflows like a member, then like a front desk staff member, then like a manager approving exceptions.
QA checklist: member-facing
- Booking confirmation: created instantly, correct class info, correct location, link works.
- Reminders: delivered at correct time zone and correct channel; no duplicate reminders for rescheduled classes.
- Waitlist promotion: notification arrives, member can see status updated, any “confirm by” window behaves as expected.
- No-show follow-up: does not blame; does not promise a credit; contains a clean next step.
- Inactivity nudge: excludes holds/cancelled members; doesn’t trigger for members who attended yesterday.
QA checklist: approval gates + internal
- Permission test: front desk attempts gated action → system blocks and creates request; manager can approve; owner-only actions are truly owner-only.
- Audit trail: each request/approval creates a clear entry in event history (who, what, when, why).
- Notification routing: manager receives a queue or alert; nothing depends on someone “checking a random inbox.”
- Member messaging: when a request is approved/denied, the member communication (if any) is accurate and consistent.
- Edge case: member disputes a no-show—ensure you can follow your policy without breaking the workflow.
If your team frequently needs exceptions, treat that as a signal to refine policies—not to expand permissions. For a structured approach to exceptions, see The Exception Budget.
Days 12–13: Staff training (role-by-role, with scripts)
Automation succeeds when staff know what they do when the system does its part. Your training should be short, practical, and built around scenarios.
Front desk training (45 minutes)
- Show the “member view”: what confirmation/reminders look like so staff can answer member questions confidently.
- Teach the exception script: “I can submit this for review, and we’ll follow up by tomorrow.” (No improvising credits on the spot.)
- Teach the request workflow: where to create it, what reason to pick, what notes to include.
- Define the escalation path: when to ping the manager, when to wait, when to say no.
- Daily habit: check the exception/request queue at opening and mid-shift (tie it to shift handoffs). If you need a handoff framework, use Gymizen Shift Handoffs.
Manager training (60 minutes)
- Approval queue ownership: review cadence (daily), SLA promise, and backup approver when off.
- How to say “yes” consistently: approved reasons that align to policy (first-time grace, documented emergency, system error).
- How to say “no” politely: short template that references policy and points to the next step.
- Weekly exception review: top 5 reasons exceptions were requested—these are your process improvements.
- Metrics: track no-show rate, late cancel rate, number of exceptions requested, and approval rate.
Coach enablement (15 minutes in a huddle)
- What changed: members will get automated reminders and follow-ups; coaches should expect fewer “what time is class?” questions.
- What didn’t: coaches should not promise credits or exceptions; they should route to front desk/manager.
- What to watch: confusion about waitlist confirmation or “I didn’t know I was in”—report patterns to the manager for tuning.
Day 14: Go-live + week-1 monitoring plan
Go-live is not the finish line. It’s the start of a one-week tuning loop. Decide in advance what you’ll monitor daily so you don’t drift into reactive chaos.
- Daily (manager): exception queue volume, time-to-approval, member complaints about messages, opt-outs (if applicable).
- Daily (front desk lead): top 10 recurring questions members ask about booking/reminders/waitlist.
- Twice in week 1: review no-show/late cancel trends to ensure reminders aren’t misfiring.
- End of week 1: hold a 30-minute retro—what to keep, what to adjust, what to add to backlog.
Common mistakes (and how to avoid them)
- Mistake: too many automations at once. Fix: launch the “first 6,” stabilize for 2–4 weeks, then add one at a time with QA.
- Mistake: automating policy enforcement before policy is trained. Fix: train staff first, then let automation amplify consistency.
- Mistake: reminders that create support tickets. Fix: include the correct action link (view/cancel), and confirm timing is correct for your time zone and schedule changes.
- Mistake: approval gates without SLAs. Fix: set a review cadence and backup approver so requests don’t languish.
- Mistake: front desk improvises “just this once.” Fix: permissions + scripts + request workflow; reinforce that exceptions are a managed resource.
- Mistake: messages feel robotic or punitive. Fix: rewrite copy to be brief, warm, and action-oriented; avoid sarcasm or guilt.
What success looks like (inside Gymizen and in your day-to-day)
After 30 days, you should be able to see—and feel—these changes:
- Fewer inbound questions about “Am I booked?” and “What time is class?” because confirmations and reminders are consistent.
- Higher waitlist fill efficiency because promotions are communicated clearly and quickly.
- Lower no-show rate (or at minimum, faster recovery) because members get timely reminders and a gentle follow-up.
- Cleaner exceptions: when exceptions happen, they’re approved intentionally with reasons—so revenue doesn’t leak invisibly.
- Manager visibility: you can review a simple log of what was approved, by whom, and why—without chasing staff for explanations.
- More proactive retention work: internal tasks highlight disengagement patterns earlier, so outreach is timely and human.
If you want to turn these signals into an operating rhythm (instead of occasional check-ins), connect automation outcomes to your weekly scorecard and actions using Weekly Reporting + Operating Cadence in Gymizen.
A simple “automation governance” rule (so the system stays clean)
To keep your automation system from slowly turning into spaghetti, adopt this governance rule:
One owner, one backlog, one change window. Only the Owner/GM can approve automation changes. All requests go into one backlog. Changes ship in a weekly or biweekly window after QA—never ad hoc during peak hours.
This is how you get the benefits of automation (consistency) without the downside (random rule changes that confuse staff and members).
Conclusion: automate the boring, gate the risky, measure the outcome
The best Gymizen automation setups don’t feel like “automation.” They feel like a studio that runs on time, communicates clearly, and treats exceptions fairly. In 14 days, you can ship a stable first version by: (1) gating money/policy/attendance truth, (2) automating a small set of high-impact member messages, (3) creating internal task queues for proactive retention, and (4) running QA like you mean it.
Once this is live, your next step is to embed it into your weekly cadence—so automation doesn’t just send messages, it drives actions that protect retention.